

Burnt-on residue at the bottom of an oven is a common nuisance that plagues many households. Whether caused by food spillages, grease splatters, or overflowing dishes, these stubborn marks can seem nearly impossible to remove. However, with the right approach and a few household staples, restoring your oven to its former glory is entirely achievable. This guide explores practical methods to tackle even the most persistent burnt-on mess, using both natural products and proven techniques that deliver results without resorting to harsh chemicals.
Understanding the causes of burnt residue
Common culprits behind oven grime
Burnt-on residue typically accumulates from several sources. Food spillages during cooking are the primary offender, particularly when roasting meats or baking dishes with high sugar content. When liquids or fats drip onto the oven floor, they carbonise under high temperatures, creating a hardened layer that adheres stubbornly to the surface. Grease splatters from frying or roasting also contribute significantly, as oils break down and polymerise when exposed to repeated heating cycles.
Why residue becomes so difficult to remove
The chemistry behind burnt-on residue explains its tenacity. When organic matter is subjected to high heat, it undergoes a process called pyrolysis, where complex molecules break down and form carbon-rich deposits. These deposits bond chemically with the oven’s enamel coating, making them resistant to simple wiping. Additionally, repeated heating cycles bake these residues further into the surface, creating multiple layers that require targeted cleaning approaches.
- High sugar content foods caramelise and harden rapidly
- Fatty substances polymerise under heat, forming tough films
- Acidic foods can etch into enamel surfaces when burnt
- Repeated heating cycles compound the problem exponentially
Understanding these underlying causes helps inform the most effective cleaning strategies, setting the stage for proper preparation before tackling the task.
Preparing your oven for cleaning
Essential safety measures
Before beginning any cleaning operation, safety must be the priority. Ensure the oven is completely switched off and has cooled down entirely, as attempting to clean a warm oven poses burn risks. Disconnect the appliance from the electrical supply if possible, or at minimum ensure all controls are in the off position. Open windows to provide adequate ventilation, particularly if using any cleaning products that may produce fumes.
Removing racks and accessories
Clear the oven of all removable components to access the burnt areas effectively. Oven racks, trays, and thermometer probes should be taken out and set aside for separate cleaning. This not only provides unobstructed access to the oven floor but also prevents these items from being damaged by cleaning solutions. Place old newspapers or protective sheets on your work surface to catch any debris during the removal process.
Initial debris removal
Use a dry brush or vacuum attachment to remove loose debris and ash from the oven bottom. This preliminary step prevents creating muddy paste when applying wet cleaning solutions. For larger chunks of burnt food, a plastic scraper can gently lift material without scratching the enamel surface. Never use metal implements at this stage, as they can permanently damage the oven’s protective coating.
| Preparation step | Time required | Materials needed |
|---|---|---|
| Cooling period | 2-3 hours | None |
| Rack removal | 5 minutes | Protective gloves |
| Debris clearing | 10 minutes | Brush, plastic scraper |
With the oven properly prepared and debris removed, the foundation is laid for applying effective cleaning solutions.
Using natural products for cleaning
The bicarbonate of soda method
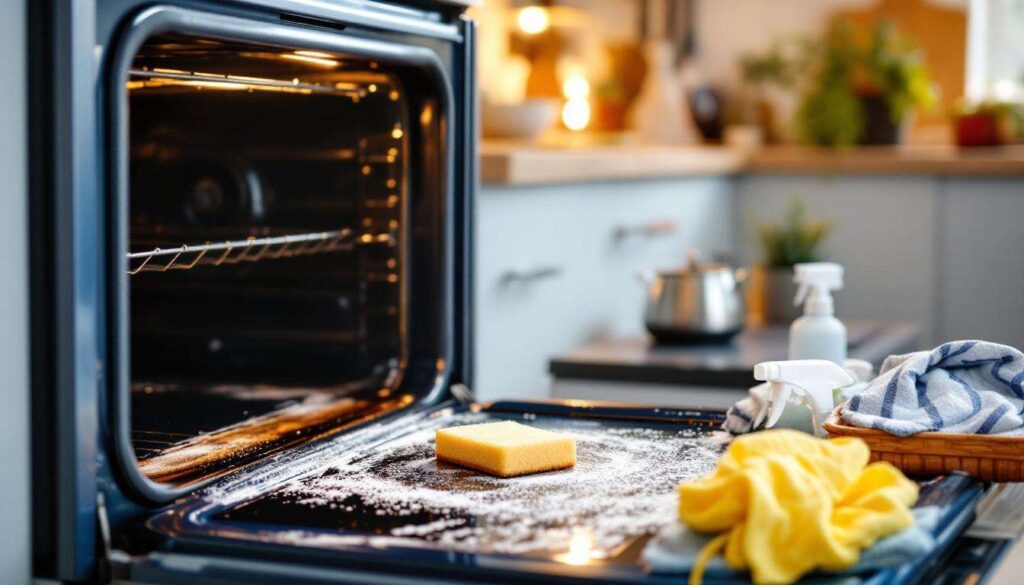
Bicarbonate of soda stands as one of the most effective natural cleaning agents for burnt-on residue. Create a paste by combining half a cup of bicarbonate of soda with three tablespoons of water, adjusting the consistency until it resembles thick cream. Apply this paste generously across all burnt areas, ensuring complete coverage. The alkaline nature of bicarbonate of soda works to break down acidic burnt residues whilst providing gentle abrasive action.
For optimal results, leave the paste to work overnight. This extended contact time allows the bicarbonate to penetrate deeply into carbonised layers, softening them considerably. In the morning, spray white vinegar over the dried paste, which will create a fizzing reaction that further loosens stubborn deposits. Wipe away the mixture with damp cloths, repeating as necessary until the surface is clean.
Vinegar steam cleaning technique
White vinegar offers another powerful natural cleaning approach. Fill an oven-safe bowl with two cups of white vinegar and place it on the bottom rack. Heat the oven to 120°C for approximately 30 minutes, allowing the vinegar to evaporate and create steam throughout the cavity. This steam cleaning method works by condensing acidic vapour onto burnt surfaces, which helps dissolve grease and carbonised matter.
- The acetic acid in vinegar breaks down alkaline grease deposits
- Steam penetrates into crevices and hard-to-reach areas
- Heat accelerates the chemical breakdown of burnt residues
- No harsh fumes or toxic chemicals are released
Lemon juice alternative
For those seeking a pleasant-smelling alternative, lemon juice provides similar acidic cleaning power to vinegar. Mix the juice of two lemons with a cup of water in an oven-safe dish. Heat at 120°C for 30 minutes, then allow the oven to cool before wiping surfaces. The citric acid effectively cuts through grease whilst leaving a fresh scent.
These natural methods prove remarkably effective for moderate to heavy soiling, leading naturally to more intensive approaches for particularly stubborn cases.
Deep cleaning techniques
Commercial oven cleaner application
When natural methods prove insufficient, commercial oven cleaners offer more aggressive chemical action. These products typically contain sodium hydroxide or potassium hydroxide, which saponify fats and dissolve carbonised deposits. Apply according to manufacturer instructions, usually spraying evenly across affected areas and leaving for the specified duration, often between 30 minutes and several hours.
Always wear protective gloves and ensure adequate ventilation when using commercial cleaners. The powerful alkaline formulations can irritate skin and respiratory passages. After the treatment period, wipe away the cleaner thoroughly with damp cloths, rinsing multiple times to remove all chemical residue.
The overnight soaking method
For extremely stubborn burnt-on residue, an overnight soaking approach delivers superior results. Combine bicarbonate of soda paste with a covering layer of damp towels placed directly over the burnt areas. This maintains moisture throughout the night, preventing the paste from drying out and maximising its penetrating action. In the morning, remove the towels and scrape away softened residue with a plastic scraper before final wiping.
Heat-activated cleaning cycle
Many modern ovens feature a pyrolytic self-cleaning function that heats the cavity to approximately 500°C, incinerating all organic matter into fine ash. This method proves highly effective but consumes significant energy and may produce smoke during the cycle. Ensure adequate ventilation and remove all racks before activating this function. Once complete and cooled, simply wipe away the remaining ash.
| Cleaning method | Effectiveness | Time investment |
|---|---|---|
| Natural products | Moderate to high | 8-12 hours |
| Commercial cleaners | High | 1-4 hours |
| Pyrolytic cycle | Very high | 2-3 hours |
Having explored intensive cleaning approaches, attention turns to preventing future build-up through regular maintenance practices.
Tip for maintaining your oven
Regular spot cleaning routine
The most effective maintenance strategy involves addressing spills immediately after cooking. Once the oven has cooled sufficiently to touch safely, wipe away any fresh spillages with a damp cloth. This prevents substances from baking on during subsequent uses, dramatically reducing the need for intensive cleaning sessions. Keeping a dedicated oven cloth near the appliance encourages this beneficial habit.
Protective measures during cooking
Prevention proves easier than cure when managing oven cleanliness. Place baking trays or sheets of aluminium foil on the rack below dishes prone to spillage, catching drips before they reach the oven floor. However, never line the oven bottom directly with foil, as this can interfere with heat circulation and potentially damage heating elements.
- Use roasting bags for fatty meats to contain splatter
- Cover dishes with lids or foil during initial high-heat cooking
- Avoid overfilling baking dishes to prevent overflow
- Clean glass oven doors weekly to monitor interior condition
Monthly light cleaning schedule
Implement a monthly light cleaning routine even when no obvious soiling is present. A quick wipe-down with bicarbonate of soda solution prevents gradual accumulation of grease films that later carbonise. This proactive approach maintains oven efficiency, as built-up residue can affect heat distribution and increase cooking times.
Establishing these maintenance habits significantly reduces cleaning burden, though proper safety protocols remain essential during any cleaning activity.
Safety advice when cleaning
Personal protective equipment
Always wear appropriate protective gear when cleaning ovens. Rubber gloves protect hands from both cleaning chemicals and sharp edges within the oven cavity. Safety glasses prevent splashes from entering eyes, particularly when using spray cleaners or when the fizzing reaction occurs between bicarbonate and vinegar. Long sleeves protect arms from accidental contact with residual heat or cleaning solutions.
Chemical handling precautions
Never mix different cleaning products, as chemical reactions can produce dangerous fumes. Specifically, combining ammonia-based cleaners with bleach creates toxic chloramine gas. Store all cleaning products securely away from children and pets, and always read product labels thoroughly before use. If accidental skin contact occurs with commercial cleaners, rinse immediately with copious amounts of water.
Ventilation requirements
Adequate airflow is crucial during oven cleaning. Open windows and doors to create cross-ventilation, and consider using an extractor fan if available. This is particularly important when using commercial cleaners or activating pyrolytic cleaning cycles. Poor ventilation can lead to headaches, dizziness, or respiratory irritation from accumulated fumes.
- Never clean ovens in completely enclosed spaces
- Allow at least 30 minutes of ventilation after using chemical cleaners
- Keep children and pets away from the area during cleaning
- Seek fresh air immediately if feeling unwell during cleaning
Electrical safety considerations
Ensure the oven is completely disconnected from power sources before deep cleaning, especially when applying liquid solutions. Water and electricity pose serious electrocution risks. Avoid saturating electrical components, control panels, or heating elements. If cleaning around these areas, use barely damp cloths rather than wet ones, and ensure everything is thoroughly dry before reconnecting power.
Burnt-on residue need not remain a permanent fixture in your oven. Through understanding the causes of stubborn deposits, properly preparing the appliance, and applying appropriate cleaning methods—whether natural products or commercial solutions—even the most challenging grime can be removed effectively. Regular maintenance practices prevent excessive build-up, whilst careful attention to safety protocols ensures the cleaning process poses no risk to health or property. By implementing these strategies, maintaining a pristine oven becomes a manageable task rather than an overwhelming chore, ensuring optimal cooking performance and extending the appliance’s lifespan.