


Patios are the heart of outdoor living spaces, but when grout lines deteriorate, the entire area can look worn and uninviting. One resourceful homeowner discovered that professional patio renovation quotes were reaching upwards of £5,000, prompting them to explore a more affordable alternative. By tackling the regrouting project themselves over a single weekend, they achieved remarkable results for a fraction of the cost. This practical approach not only transformed their outdoor space but also demonstrated that significant savings are possible with the right techniques and dedication.
The high cost of patio renovation
Professional patio restoration services command premium prices that can strain household budgets. When homeowners contact landscaping companies for quotes, they often receive estimates that include labour costs, materials, equipment hire, and disposal fees. The total expense quickly accumulates, particularly for larger patio areas or those requiring extensive repair work.
Breaking down professional renovation costs
Understanding where the money goes helps explain why professional services are so expensive. Labour typically represents the largest portion of any renovation quote, with experienced tradespeople charging between £150 and £300 per day. For a standard patio regrouting project, professionals may require three to five days to complete the work properly.
| Cost Component | Estimated Range |
|---|---|
| Labour (3-5 days) | £450 – £1,500 |
| Materials and supplies | £200 – £500 |
| Equipment hire | £100 – £300 |
| Waste disposal | £50 – £150 |
| Total professional cost | £800 – £2,450+ |
Additional factors influencing renovation prices
Several variables can push costs even higher. Properties in London and the South East typically face premium pricing compared to other regions. The condition of existing paving stones, accessibility of the work area, and complexity of patterns all contribute to final quotes. Some contractors also include contingency fees for unexpected complications discovered during the project.
These substantial expenses make the DIY alternative increasingly attractive, especially when homeowners possess basic practical skills and the willingness to invest time rather than money.
The benefits of patio regrouting
Regrouting offers advantages that extend far beyond immediate cost savings. This restoration method addresses both aesthetic concerns and structural integrity, making it a comprehensive solution for deteriorating outdoor spaces.
Visual transformation and kerb appeal
Fresh grout lines create a dramatic visual impact that revitalises the entire patio. Clean, uniform joints between paving stones provide a crisp, well-maintained appearance that enhances property value. The transformation is particularly noticeable when comparing before and after photographs, with homeowners often surprised by how much difference properly executed regrouting makes to their outdoor environment.
Structural and functional improvements
Beyond appearances, regrouting delivers practical benefits that protect your investment:
- Prevents water infiltration that can cause subsidence and frost damage
- Reduces weed growth between paving stones
- Stabilises individual pavers, preventing movement and trip hazards
- Creates a more hygienic surface by eliminating gaps where debris accumulates
- Extends the lifespan of existing paving materials by decades
Long-term financial advantages
The initial investment in regrouting materials typically ranges from £100 to £300, depending on patio size and chosen products. This represents a saving of approximately 85-95% compared to professional services. Additionally, proper regrouting postpones the need for complete patio replacement, which could cost £3,000 to £10,000 or more.
With these compelling advantages established, the next consideration involves gathering the appropriate materials to ensure professional-quality results.
Materials needed for regrouting a patio
Success in any DIY project depends heavily on having the correct supplies before starting work. Regrouting requires specific materials that ensure durability and proper adhesion.
Essential grouting products
The centrepiece of your project is the jointing compound or grout itself. Modern patio grout comes in several formulations:
- Resin-based jointing compounds that offer superior flexibility and weather resistance
- Cement-based mortars for traditional applications
- Polymeric sand that hardens when wetted
- Epoxy grouts for maximum durability in high-traffic areas
For a typical weekend project, resin-based compounds provide the best balance of workability, durability, and ease of application for DIY enthusiasts.
Tools and equipment checklist
| Tool Category | Specific Items |
|---|---|
| Removal tools | Grout rake, wire brush, narrow chisel |
| Cleaning equipment | Pressure washer, stiff broom, bucket |
| Application tools | Pointing trowel, grouting gun, sponge |
| Safety gear | Gloves, knee pads, safety glasses |
| Finishing items | Jointing iron, clean cloths, water sprayer |
Protective and preparatory supplies
Beyond the primary materials, several supporting items facilitate smooth project execution. Weed killer addresses existing vegetation in joints, whilst patio cleaner removes organic staining and improves grout adhesion. Masking tape protects adjacent surfaces, and plastic sheeting safeguards plants or features near the work area.
Most materials are readily available from builders’ merchants and DIY retailers, with total costs remaining well below professional service charges. Once assembled, attention turns to preparing the patio surface for optimal results.
Surface preparation before regrouting
Thorough preparation determines the longevity and appearance of regrouting work. Rushing this stage compromises adhesion and leads to premature failure, negating the time and money invested.
Removing old grout and debris
The first task involves extracting deteriorated grout from existing joints. A grout rake efficiently removes loose material, whilst a narrow chisel addresses stubborn sections. Aim to clear joints to a depth of at least 25-40mm for adequate new grout thickness. This process generates considerable dust and debris, so work systematically across small sections rather than attempting the entire patio simultaneously.
Deep cleaning and vegetation control
After grout removal, comprehensive cleaning ensures proper bonding. A pressure washer set to appropriate intensity removes embedded dirt, algae, and organic matter without damaging paving stones. Pay particular attention to:
- Joint edges where new grout will adhere
- Paver surfaces immediately adjacent to joints
- Any stained or discoloured areas
- Corners and edges where debris accumulates
Apply weed killer to joints several days before regrouting to eliminate root systems that might compromise the new grout.
Drying time and final inspection
Allow the patio to dry completely before applying new grout, typically requiring 24-48 hours depending on weather conditions. Moisture trapped beneath fresh grout prevents proper curing and weakens the bond. During this waiting period, inspect the patio for any loose or damaged pavers that require attention. Address these issues before proceeding to avoid complications later.
With the surface properly prepared and dried, the actual regrouting process can commence, transforming your patio over the course of a weekend.
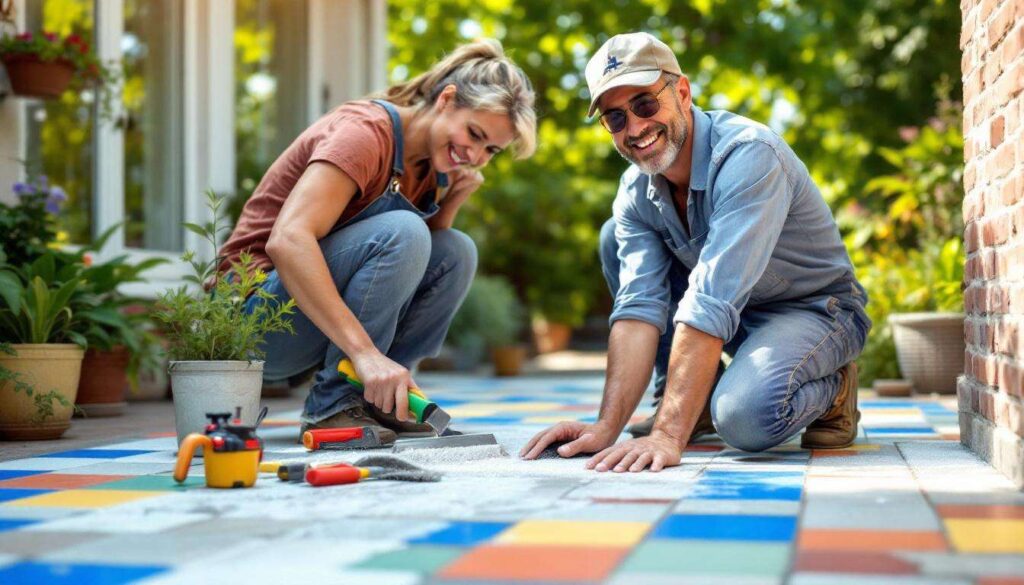
Steps to regrout your patio in a weekend
A methodical approach ensures consistent results whilst making efficient use of limited time. Breaking the project into manageable stages prevents rushing and maintains quality throughout.
Saturday morning: mixing and initial application
Begin by mixing grout according to manufacturer specifications, paying careful attention to water-to-powder ratios. Most resin-based compounds require thorough mixing to achieve proper consistency. Work in batches that can be applied within the product’s working time, typically 30-60 minutes.
Start application in a corner or edge, working systematically across the patio. Use a pointing trowel or grouting gun to push material deep into joints, ensuring complete filling without air pockets. Overfill joints slightly, as grout settles and compacts during finishing.
Saturday afternoon: finishing and initial curing
Once joints are filled, use a jointing iron or similar tool to smooth and compact the grout surface. This step creates uniform joint profiles and removes excess material. The finishing technique depends on desired aesthetics:
- Flush finish: grout level with paver surfaces
- Recessed finish: grout slightly below paver level for traditional appearance
- Raised finish: grout slightly above pavers for maximum weather protection
Clean paver surfaces immediately with a damp sponge, removing grout residue before it hardens. Allow the first section to cure whilst continuing work on remaining areas.
Sunday: completing application and final touches
Continue the grouting process across the remaining patio sections, maintaining consistent technique and joint profiles. As work progresses, periodically inspect completed areas for any settling or imperfections that require additional grout. Address these issues promptly whilst material remains workable.
After completing all joints, perform a final cleaning pass to remove any grout haze from paver surfaces. Some products may require light misting with water during initial curing to prevent surface cracking.
Proper maintenance following completion ensures your regrouting investment delivers lasting value and continues protecting your patio for years ahead.
Maintenance and durability of the new grout
The longevity of regrouting work depends significantly on post-installation care and regular maintenance practices. Understanding how to protect your investment maximises the return on your weekend effort.
Initial curing period requirements
Most grout products require a curing period of 24-72 hours before the patio can withstand foot traffic. During this time, protect the surface from rain using temporary covers if necessary. Avoid placing furniture or heavy objects on the patio for at least one week to allow full strength development. Some resin-based compounds benefit from light water misting during the first few days, preventing rapid drying that can cause surface cracking.
Ongoing maintenance practices
Regular care preserves both appearance and structural integrity:
- Sweep the patio weekly to prevent debris accumulation in joints
- Pressure wash annually using appropriate settings that won’t damage grout
- Apply weed killer preventatively rather than waiting for growth
- Inspect joints seasonally for any signs of deterioration
- Address minor damage promptly before it spreads
Expected lifespan and performance
| Grout Type | Expected Durability |
|---|---|
| Resin-based compounds | 15-25 years |
| Cement-based mortars | 10-15 years |
| Polymeric sand | 8-12 years |
| Epoxy grouts | 20-30 years |
Quality materials installed correctly can outlast cheaper alternatives by decades, making the initial product selection crucial for long-term value.
Regrouting a patio represents an accessible DIY project that delivers professional-quality results whilst saving thousands of pounds. The homeowner who inspired this guide transformed their outdoor space for under £300, avoiding the £5,000 professional quote through careful planning and weekend dedication. By following systematic preparation, using appropriate materials, and applying proper techniques, any reasonably practical homeowner can achieve similar success. The combination of immediate cost savings, enhanced property appearance, and extended patio lifespan makes regrouting one of the most rewarding home improvement projects available. With basic tools, quality materials, and two focused days of work, your patio can regain its former glory whilst your bank balance remains healthy.